From Hand Skill to Shared Knowledge
Learn how to pass on rural craft skills through demonstration, practice, and explanation, choosing an approach that fits the learner and the work.
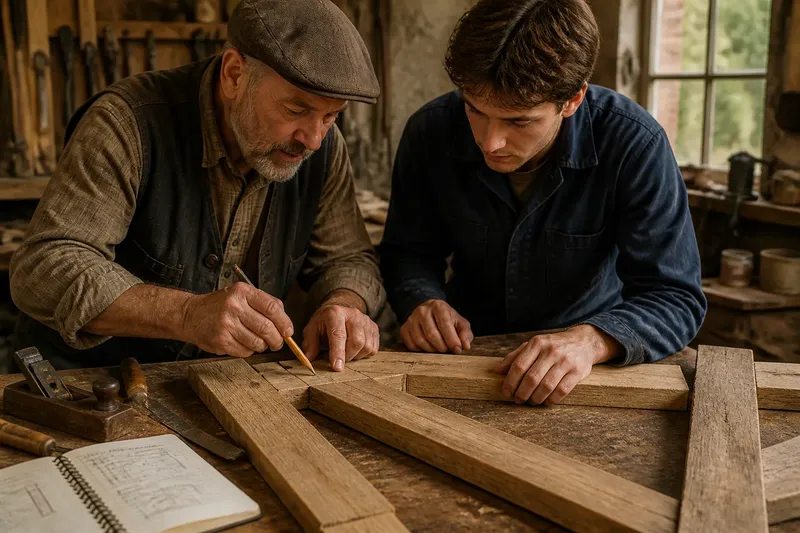
Passing on a rural craft skill takes more than putting someone beside an experienced worker. A new thatcher, baker, farrier, or repairer needs to see the task, try it, and hear why one choice suits the material and the moment. The right teaching approach depends on what the learner already knows, how much room there is for practice, and whether the work can safely pause for questions.
That distinction matters in small communities, where a trade may be taught informally between neighbors, relatives, seasonal workers, or people sharing a workshop. A good handover does not merely produce one competent attempt. It gives the learner enough understanding to notice when conditions change and to ask a useful question before guessing.
Start with the learner
Before choosing a method, consider the learner’s starting point. Someone who has handled tools but not a particular material may need a short demonstration and a chance to feel the difference between sound and unsuitable stock. A beginner may need the task divided into manageable parts, with time to identify tools and understand how they are used. A returning worker may be ready to explain their own decisions and compare them with local practice.
Ask what the person has done before, what they want to be able to do, and which part feels least clear. These questions need not turn a neighborly lesson into a formal interview. They simply help the teacher avoid spending an afternoon explaining familiar ground while skipping the point that makes the work difficult.
When demonstration leads
Use demonstration when a skill depends on timing, touch, posture, or a sequence that is hard to picture from spoken directions. Watching a weaver maintain even tension, a woodworker read grain, or a cook judge dough by feel can reveal details that are easy to miss in a verbal description. The teacher should work at a pace the learner can follow and make the important movements visible rather than rushing through a polished result.
One useful pattern is to show a whole task once, then repeat the tricky portion more slowly. At each pause, name what is being noticed: resistance in the tool, the direction of a fiber, the sound of a joint seating, or a change in the material’s appearance. The learner can then watch for those cues instead of trying to memorize every movement at once.
Demonstration alone fits poorly when the learner needs to make judgment calls that cannot be seen from one finished performance. A clean result may conceal a choice about weather, material quality, or the intended use of an item. In that case, explain the decision as well as the motion.
When practice leads
Practice should lead when the central difficulty is coordinating several simple actions or developing a feel for the work. Let the learner take a real but limited part of the task, such as preparing a small section of material or shaping a sample piece. A small, reversible attempt is often more instructive than watching another flawless demonstration.
Give feedback on one or two observable details at a time. “Keep the blade closer to the marked line” gives a learner something to adjust; “be more careful” does not. Leave room for a second attempt, then ask what changed and what still feels uncertain. The answer can reveal whether the obstacle is technique, tool choice, or an unclear instruction.
Practice is not the right first move for every task. Where an error could injure someone, damage valuable work, or create a hazard, teaching should remain within appropriate supervision and established safety procedures. The learner can still build understanding through observation and discussion rather than being encouraged to attempt work beyond their preparation.
When conversation leads
Conversation should lead when the hardest part is deciding what to do, not performing a familiar motion. Ask the experienced worker to describe what they inspect before starting, what would make them change course, and what signs tell them the result is ready. These questions bring tacit judgment into view without treating local knowledge as a rigid formula.
Imagine a new hand helping repair a gate in a village workshop. The experienced carpenter demonstrates how to mark and fit a brace, then explains that the wood’s twist affects where the brace should sit. The learner tries the next piece and sees that a mark copied from the first would leave a gap. The useful lesson is not simply “fit a brace this way”; it is to inspect each piece and understand why the fitting changes.
Conversation also helps preserve distinctions that are easy to flatten in a written note. A local term may refer to a particular material, condition, or way of doing a job. Ask what the term means in practice and when it applies. A notebook can record the explanation, but it cannot replace a chance to ask follow-up questions while the object is in view.
Choose the teaching mix
Most craft learning uses all three approaches, but the order should fit the situation. Use this guide to decide where to put the emphasis:
- The learner is new to the tools: Begin with a paced demonstration and name the parts, materials, and visible cues. Move to a small practice task when the learner can describe what they are watching.
- The learner knows the basics but lacks control: Give them a bounded section to practice, then offer specific feedback. Add another demonstration only for the movement or adjustment that remains difficult.
- The learner can perform the motion but hesitates over choices: Make conversation central. Talk through what the worker checks, what alternatives are available, and how the intended use affects the decision.
- The work changes with material or conditions: Combine demonstration with explanation. Show more than one relevant condition if possible, and ask the learner to say which cue would alter the next move.
- The task is hazardous or hard to reverse: Keep the learner’s role within appropriate supervision and safe limits. Teach recognition and reasoning before inviting hands-on participation.
- Time together is brief: Choose one useful part of the skill, not a rushed tour of the whole trade. Leave a clear note about what was covered and what question should be picked up next.
These choices are not fixed learning styles. A beginner may understand the reasoning quickly but need repeated practice; an experienced person may need a demonstration because the material is unfamiliar. Reassess as the work proceeds rather than assigning someone a permanent role as “the watcher” or “the hands-on learner.”
Make reasoning visible
Explaining why a step matters helps a learner transfer a skill to a different piece of timber, a new batch of wool, or a changed work setting. The explanation need not be a lecture. A short prompt often works better: “What do you notice about this edge?” or “What might happen if we use the same mark here?” The learner has a chance to observe and answer before the teacher supplies the reasoning.
For the teacher, it can take effort to put familiar judgment into words. A useful habit is to narrate the decision just before acting: “This section is softer, so I’ll ease the pressure,” or “I’m checking the fit before fixing it in place.” Then invite the learner to identify the cue. The point is not to make every choice sound certain; it is to show how a decision follows from what is visible and what the work needs.
Tools, materials, and local terminology vary, so follow relevant manufacturer instructions and local requirements wherever they apply. That boundary leaves plenty of room for a teacher to explain the craft choices that belong to the work itself.
Questions to settle?
How much should a teacher demonstrate?
Show enough for the learner to see the whole task and its important cues, then repeat only the parts that need closer attention. If the learner cannot explain what they are watching, slow the demonstration or name the cue more plainly.
Should learners copy the teacher exactly?
Copying can help with a first attempt, especially when posture or sequence matters. The next conversation should distinguish essential features from personal habits, so the learner can adapt without mistaking every preference for a rule.
What if local methods differ?
Ask what each method is intended to solve and what conditions it assumes. Comparing the reasoning can help learners recognize when a familiar approach fits and when another choice may be more suitable.
How can knowledge survive a short handover?
Write down the tools, materials, key cues, and unresolved questions while they are still fresh. If possible, arrange a later conversation or another supervised opportunity to revisit the task; a note is a bridge, not a substitute for practice.
Leave room to return
A useful handover ends with a clear next point, not a claim that the learner has mastered the craft. Name what they can now attempt, what still calls for guidance, and what question to bring back. In a rural trade, skill grows through repeated contact with materials and people; careful teaching makes both the visible motions and the reasons behind them easier to carry forward.
For anyone choosing how to pass on a rural craft skill, the practical decision is simple: demonstrate what must be seen, make space to practice what must be felt, and talk through choices that depend on judgment. That balance lets a learner become more than a careful imitator, while keeping the experience of the older hand connected to the work ahead.